


Disclosure: This article contains affiliate links. We may earn a commission from purchases at no extra cost to you, which helps our travel content.
When my dental conference in Santiago concluded last autumn, I made what might be my most impulsive decision in decades of business travel: extending my Chilean journey with a week on Rapa Nui, that mysterious speck in the Pacific better known as Easter Island. As a photographer who typically documents European ferry crossings and maritime history, I found myself utterly captivated by a completely different subject—the island's enigmatic Moai statues. Standing before these ancient stone sentinels at magic hour, watching as golden light transformed their stoic expressions, I realized I was experiencing a photographer's paradise unlike any other. This remote Chilean territory, over 3,700 kilometers from the mainland, presents unique challenges and extraordinary opportunities for photographers willing to make the journey. After a week of dawn expeditions, sunset vigils, and starlit adventures, I'm delighted to share my comprehensive guide to photographing one of humanity's most compelling archaeological treasures.

Planning Your Photographic Expedition
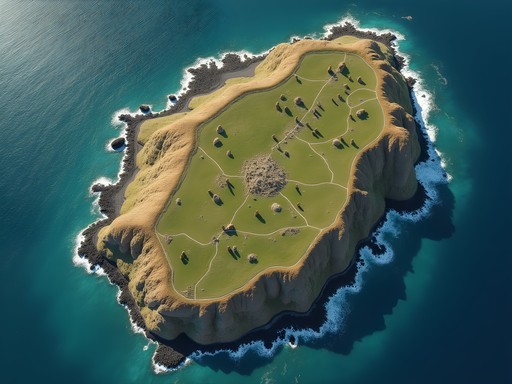
Easter Island may be just 163 square kilometers, but photographing it properly requires strategic planning. I arrived in early October, during the island's shoulder season, which proved ideal—the summer crowds (December-February) hadn't yet materialized, and the spring weather offered comfortable temperatures averaging 20°C with manageable precipitation.
My accommodation at the Hangaroa Eco Village & Spa provided an excellent base for my photographic explorations. While certainly a luxury splurge compared to my usual mid-range business accommodations, the property's location near Hanga Roa village offered convenient access to several key sites while providing the reliable Wi-Fi and comfortable workspace I needed for editing sessions.
Renting a vehicle is absolutely essential for photographers. The island's main archaeological sites are scattered along the coastline, and reaching prime locations before sunrise requires independent transportation. I secured a 4WD Suzuki Jimny—overkill for the island's paved roads but reassuring on the unpaved tracks to some remote sites. Book your vehicle well in advance, as the island's rental fleet is limited.
Perhaps most importantly, purchase the national park ticket immediately upon arrival at the airport. This mandatory pass (currently 80,000 CLP/~80 USD for foreigners) allows access to all major archaeological sites, though note that Orongo and Rano Raraku permit only one visit each during your stay—plan these excursions carefully.

💡 Pro Tips
- Visit in shoulder season (April-May or October-November) for fewer crowds and moderate weather
- Reserve your rental vehicle at least two months in advance
- Download offline maps and site information before arrival, as internet access is limited outside accommodations
Essential Photography Equipment for Easter Island
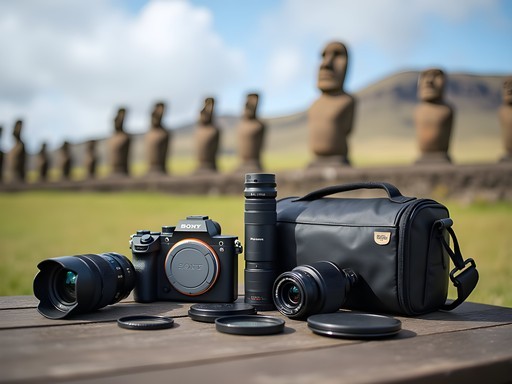
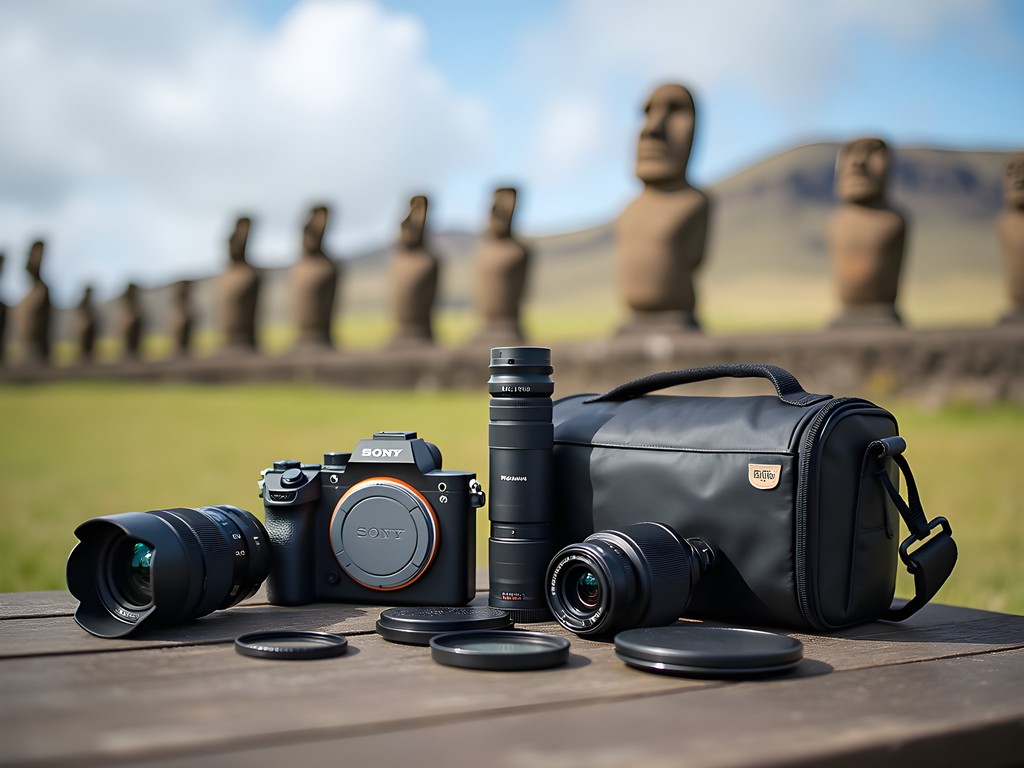
After decades of travel photography, I've learned to pack precisely for each destination. For Easter Island, I prioritized versatility and protection against the elements. My camera backpack proved ideal for daily excursions, with sufficient compartments for equipment while remaining comfortable during extended hikes.
For lenses, I primarily relied on three workhorses:
- A 16-35mm f/4 wide-angle zoom: Essential for capturing the dramatic alignments of Moai against vast landscapes and star-filled skies
- A 24-70mm f/2.8 standard zoom: My most frequently used lens for balancing composition flexibility with excellent image quality
- A 70-200mm f/4 telephoto: Perfect for isolating distant Moai details and compressing perspective along the Ahu Tongariki lineup
While my professional full-frame camera delivered exceptional image quality, particularly for night photography, a mid-range mirrorless system would serve most photographers admirably. The island's strong winds and occasional rain showers make weather-sealing a valuable feature.
Additional essentials included:
- A sturdy carbon fiber tripod (mandatory for sunrise/sunset/night photography)
- Polarizing and neutral density filters (to manage the intense Pacific light)
- Extra batteries and memory cards (charging opportunities may be limited during all-day excursions)
- Lens cleaning supplies (the combination of sea spray, dust, and wind creates challenging conditions)
Perhaps most critically, bring a headlamp with a red light mode for navigating to pre-dawn positions without disturbing other photographers or compromising your night vision.
💡 Pro Tips
- Bring twice as many batteries as you think you'll need—charging options are limited during day trips
- A polarizing filter is essential for managing reflections on the ocean and enhancing the volcanic stone of the Moai
- Pack lens cleaning supplies in a sealed container—the combination of salt air and volcanic dust is particularly challenging
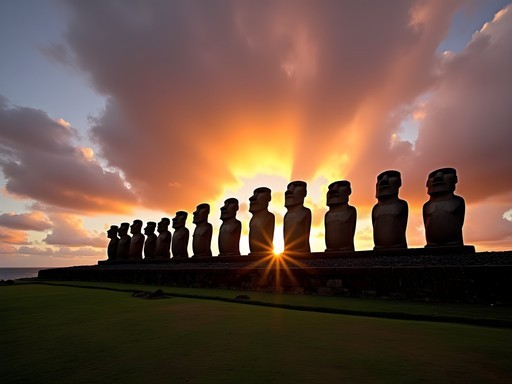
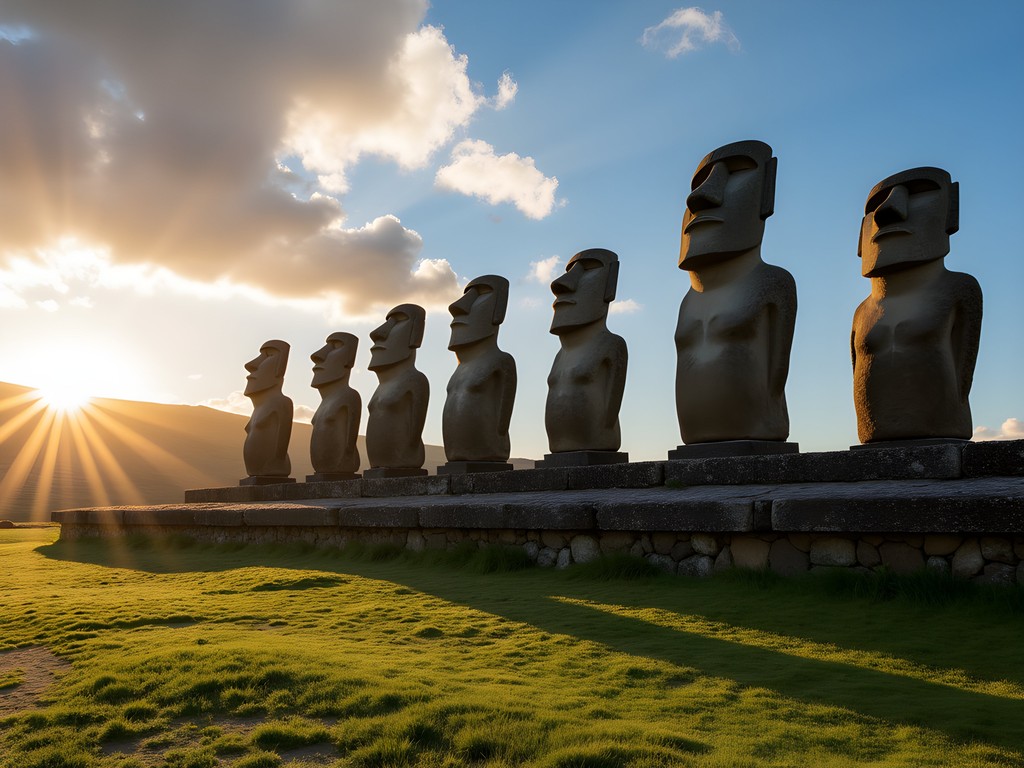
Ahu Tongariki: Mastering the Iconic Sunrise
If there's one photographic experience that defines Easter Island, it's capturing sunrise at Ahu Tongariki. This magnificent platform with fifteen Moai standing in formation creates the island's most recognizable image when backlit by the rising sun.
Arrive no later than one hour before official sunrise. During my visit in October, this meant a 5:00 AM departure from my accommodation. The site opens at 7:00 AM officially, but photographers are generally permitted earlier access specifically for sunrise (always verify current policies). I recommend arriving in near-darkness to secure an optimal shooting position and acclimate to the environment.
Positioning is crucial at Tongariki. While most photographers cluster directly in front of the platform, I found two alternative perspectives particularly compelling:
- From the north side, incorporating the nearby ocean as foreground with the Moai silhouetted against brightening sky colors
- From a slightly elevated position on the gentle slope behind the standard viewing area, which allowed me to incorporate both the Moai and the dramatic cliff face of Rano Raraku (the quarry where they originated) in a single composition
The light changes rapidly during the golden hour. I began with a series of silhouette shots (exposure compensation -1.0 to preserve sky detail) as pre-dawn colors intensified. As direct sunlight struck the Moai, I switched to bracketed exposures (±2 stops) to capture the full dynamic range between the bright sky and the still-shadowed platform.
While wide-angle compositions capture the impressive scale of the fifteen-Moai alignment, don't neglect telephoto opportunities. The compression effect of a 70-200mm lens creates dramatic layering between the statues, particularly as directional light begins revealing their distinct facial features and expressions.
Finally, don't rush away after sunrise. Most tour groups depart within 30 minutes of sunrise, but the quality of light remains exceptional for at least an hour afterward, with fewer photographers competing for positions.

💡 Pro Tips
- Set up your tripod on stable ground—the coastal winds at Tongariki can be surprisingly forceful
- Bracket your exposures (±2 stops) during the critical 15 minutes around sunrise to capture the full dynamic range
- Bring a thermos of coffee and snacks—the pre-dawn wait in cool temperatures demands sustenance

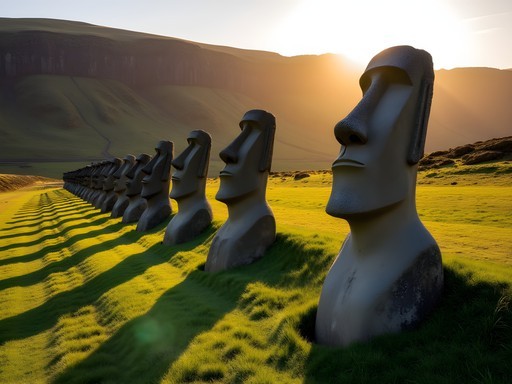
Rano Raraku: The Moai Quarry in Perfect Light
While Tongariki offers the classic Easter Island tableau, I found Rano Raraku—the volcanic crater where nearly all Moai were carved—to be the most compelling photographic site on the island. This archaeological treasure presents hundreds of Moai in various stages of completion, from barely-started figures still attached to the bedrock to completed statues partially buried by centuries of erosion.
Rano Raraku requires careful timing. The site opens to visitors at 9:00 AM, and park rules permit only one visit per ticket. I strategically chose a partly cloudy afternoon, arriving at 3:00 PM to capture the quarry in softer light as the sun began its westward descent.
The walking path through Rano Raraku creates a natural photographic progression. Begin with wider contextual shots establishing the crater's dramatic setting, then gradually focus on individual Moai as you ascend the path. The interplay of light and shadow across the porous volcanic tuff reveals remarkable detail in the statues' features.
For truly distinctive images, look for these specific opportunities:
- Moai faces illuminated by sidelighting, which accentuates their carved details
- Compositions juxtaposing finished and unfinished figures to tell the site's archaeological story
- The dramatic interior crater lake, best photographed from the upper viewpoint with a wide-angle lens
I found my polarizing filter particularly valuable at Rano Raraku. The filter reduced glare on the volcanic stone, revealing subtle color variations and enhancing the contrast between the Moai and the lush grass surrounding their partially buried forms.
While tripods are permitted, the constant movement of other visitors along the narrow paths makes handheld shooting more practical for most compositions. I maintained a minimum shutter speed of 1/125s to ensure sharpness, increasing my ISO as needed in shadowed areas rather than risking motion blur.

💡 Pro Tips
- Visit Rano Raraku in afternoon light (2:00-5:00 PM) when the western faces of many Moai receive beautiful sidelighting
- Bring a zoom lens with macro capability to capture both landscape contexts and fine details of the Moai carvings
- Allow at least three hours to thoroughly photograph the site—rushing through this location is the most common regret among visiting photographers
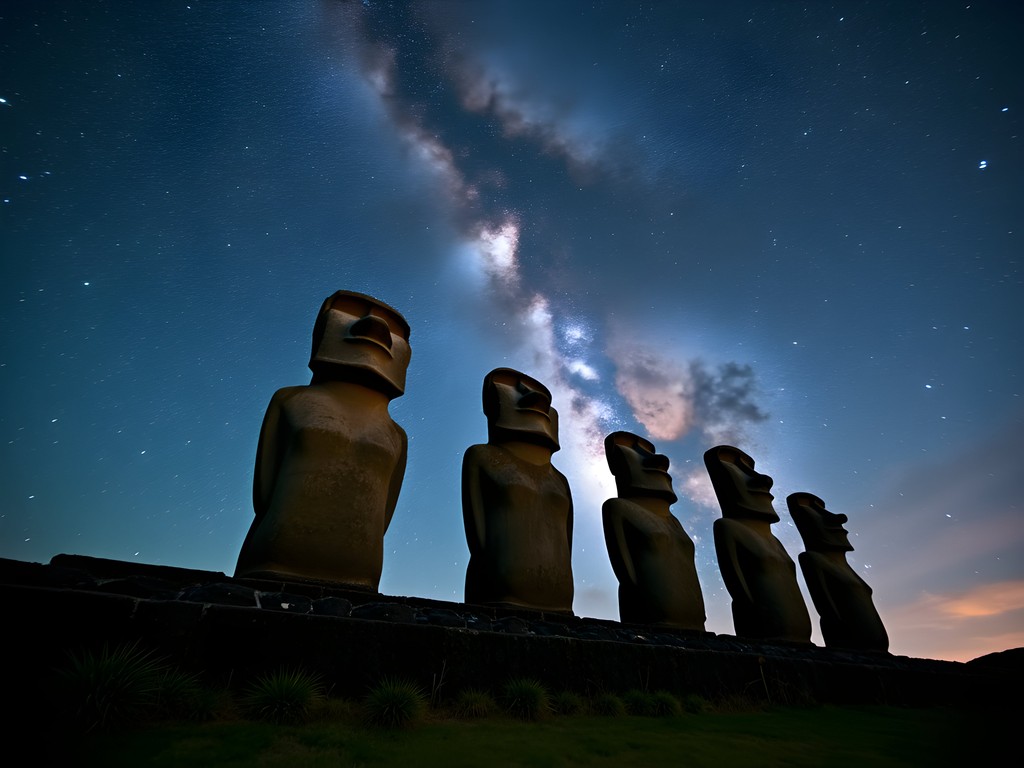
Night Photography: Moai Under Southern Stars
After years photographing European architecture at night, I found Easter Island's dark skies presented an entirely different nocturnal challenge—one that yielded some of my most compelling images from the journey. The island's remote location, minimal light pollution, and southern hemisphere positioning create extraordinary opportunities for astrophotography with Moai as foreground elements.
Anakena Beach offers perhaps the most accessible night photography location. The site's seven Moai at Ahu Nau Nau stand on a platform near the beach, creating perfect silhouettes against the star-filled sky. The palm trees framing this scene add a distinctly Polynesian element absent at other Moai sites.
For successful night compositions, I arrived during late blue hour (approximately 30-45 minutes after sunset) to establish compositions while natural light still defined the horizon. This approach allowed me to:
- Precisely focus on the Moai using remaining daylight
- Lock composition and settings before complete darkness
- Capture the transition from dusk to astronomical darkness in a series of images
Technical considerations for Easter Island night photography are demanding. I relied on these specific settings:
- Aperture: f/2.8 (or widest available)
- ISO: 3200-6400, depending on moonlight conditions
- Shutter speed: 15-20 seconds (longer exposures created star trails)
- White balance: 3800K to maintain the natural blue of the night sky
A sturdy tripod is absolutely non-negotiable, as is a remote shutter release to prevent vibration during long exposures. I also found my headlamp with red light mode invaluable for preserving night vision while adjusting equipment.
While official park hours technically limit access to many sites after sunset, Anakena Beach remains accessible, as does the roadside platform at Ahu Tahai near Hanga Roa town. For other locations, verify current access policies or arrange special photography permits through local guides.
The Milky Way core is visible from Easter Island between February and October, with April-June offering the best alignment for night compositions. During my October visit, I captured the Milky Way's edge region, still creating dramatic celestial backdrops for the silhouetted Moai.
💡 Pro Tips
- Use the PhotoPills app to plan precise Milky Way alignments with specific Moai platforms
- Bring a small flashlight for subtle light painting to reveal Moai details during long exposures
- Pack extra batteries—night photography in cooler temperatures depletes them rapidly
Beyond the Iconic: Lesser-Known Photographic Treasures
While Tongariki and Rano Raraku justifiably dominate Easter Island photography guides, some of my most distinctive images came from less-frequented locations. After the tour buses departed each afternoon, I found myself alone at several remarkable sites that offered unique photographic opportunities.
Ahu Akivi presents seven Moai facing the ocean—the only group on the island oriented toward the sea rather than inland. This astronomical alignment (the statues face sunset during the spring equinox) creates compelling compositions, particularly in late afternoon when warm light illuminates their western-facing surfaces. The inland location means you'll need a wider lens to capture the statues without coastal elements as context.
The petroglyphs at Papa Vaka offer a completely different photographic subject. These intricate rock carvings depict marine creatures and canoes, telling stories of the island's seafaring history. Photograph these in morning light when low-angle illumination creates shadow contrast that reveals the subtle carvings. I found my macro lens invaluable for documenting these detailed cultural artifacts.
For landscape photographers, the three volcanic craters—Rano Kau, Rano Raraku, and Rano Aroi—offer spectacular opportunities. Rano Kau's massive caldera, visible from the ceremonial village of Orongo, presents a perfect sunrise location. Arrive before dawn to capture the crater lake illuminated by first light, then explore the adjacent stone houses of Orongo with their ceremonial carvings.
The cave systems along the island's coastline present challenging but rewarding subjects for photographers comfortable with difficult conditions. Ana Kakenga (the "Cave of Two Windows") frames the Pacific Ocean through natural openings in the volcanic rock. Bring a wide-angle lens and prepare for significant dynamic range challenges when composing the dark cave interior against the bright ocean beyond.
Finally, don't overlook the island's living culture. The February Tapati Festival celebrates Rapa Nui traditions with competitions, dancing, and body painting. While my October visit missed this event, fellow photographers shared extraordinary images of cultural performances with the Moai as backdrops—a compelling reason for a return visit.
💡 Pro Tips
- Visit Ahu Akivi approximately two hours before sunset when the statues receive perfect front lighting
- Bring a powerful flashlight when photographing cave systems—natural light penetrates only a few meters beyond the entrances
- Consider a graduated neutral density filter for balancing exposure between bright skies and darker foregrounds at crater viewpoints
Final Thoughts
As my week on Easter Island drew to a close, I found myself reviewing images that differed dramatically from my usual portfolio of European maritime scenes and night photography. Yet the technical skills honed through decades behind the lens served me well in this remote Pacific outpost, where light, weather, and ancient stone combine to create photographic opportunities unlike anywhere else on Earth. While capturing these enigmatic Moai required early mornings, careful planning, and technical precision, the resulting images rank among my most treasured travel photographs. Whether you're drawn by archaeological interest, landscape opportunities, or the challenge of night photography under southern stars, Easter Island rewards photographers willing to venture beyond the obvious compositions and standard viewpoints. As I boarded my return flight to Santiago—camera cards full and spirit enriched—I couldn't help but reflect on how these silent stone sentinels had stood witness to centuries of human history. Through our photographs, we ensure their enigmatic presence continues to captivate generations who may never make this remarkable journey themselves.
✨ Key Takeaways
- Timing is everything—visit key sites at sunrise, sunset, and after dark for dramatically different photographic opportunities
- Weather protection for your equipment is essential in Easter Island's unpredictable coastal environment
- Look beyond the iconic sites to discover unique compositions at lesser-known archaeological locations
📋 Practical Information
Best Time to Visit
April-May or October-November (shoulder seasons)
Budget Estimate
$3,000-5,000 USD for one week including flights from Santiago
Recommended Duration
5-7 days minimum
Difficulty Level
Moderate
Comments
Kimberly Murphy
Brilliant post Katherine! I did a similar trip combining mainland Chile with Easter Island and it's honestly one of the best decisions I've made. Your point about the quarry being less crowded in the afternoon is spot on. I'd also recommend Ahu Tahai for sunset - it's closer to Hanga Roa so easier if you're tired, and you get the moai silhouetted against the Pacific. The light there is absolutely gorgeous. Also bring extra memory cards - you'll take WAY more photos than you think! I filled up my memory card in three days and had to delete some mediocre shots to keep shooting.
coffeewanderer
What lens did you use for most of these shots?
Katherine Fisher
I brought a 24-70mm and a 70-200mm. The 24-70mm got the most use - perfect for the wide moai landscapes and versatile enough for details. The telephoto was great for compressing those rows of statues at Tongariki though!
oceanadventurer7327
Really helpful guide! Quick question - did you find the island easy to navigate on your own or would you recommend booking some guided tours? I'm planning 5 days there in September.
Katherine Fisher
It's very easy to navigate! The island is small and the main sites are well marked. I did everything independently with a rental car. Save your money and skip the tours unless you really want historical context.
starwalker3945
Adding this to my bucket list!! The moai at sunset look absolutely unreal
Nicole Russell
Katherine this is STUNNING work! I was on Easter Island last year and totally agree about Rano Raraku in the late afternoon - the shadows on those half-buried moai are just magical. One thing I'd add for photographers is to bring a polarizing filter. The sky there is so intensely blue it can blow out if you're not careful, and the filter really helps manage that contrast. Also the wind is NO JOKE - I had to weight down my tripod with my backpack more than once!
starwalker3945
Good tip about the polarizing filter!
skymood
How early did you have to get up for the Ahu Tongariki sunrise? Trying to figure out if I need to rent a car or if tours get there in time.
Katherine Fisher
I was there by 5:45am in autumn. Definitely recommend renting a car - gives you flexibility to stay as long as you want and the light keeps changing beautifully for about an hour after sunrise!
skymood
Perfect, thanks!
hikingadventurer
Wow those sunrise shots are incredible!
beachlife
Love this! Really helpful tips, thanks for sharing
wanderlustmood
How many days would you recommend staying to hit all these photo spots? Planning a trip for next year!
nomadwanderer
This looks amazing but I'm not a professional photographer - is it still worth going if I just have my phone camera? Or should I wait until I can afford better gear?
globewalker
Definitely go! The moai are incredible in person regardless of your camera. The experience matters more than the gear.
beachlife
agree with globewalker! modern phone cameras are actually pretty solid esp in good light
Venture X
Premium card with 2X miles, $300 travel credit, Priority Pass