


Disclosure: This article contains affiliate links. We may earn a commission from purchases at no extra cost to you, which helps our travel content.
As someone who's spent a decade analyzing crime scenes, I've developed an eye for capturing details others miss. Ironically, it was this same skill that drew me to underwater photography in Raja Ampat—a realm where evidence of nature's magnificence is everywhere, if you know how to document it. This Indonesian archipelago houses the planet's most biodiverse marine ecosystem, with over 1,500 fish species and 75% of the world's known coral species in waters so pristine they redefine the concept of blue.

Essential Underwater Photography Equipment
Let me be direct: your equipment can make or break your Raja Ampat photography experience. After multiple trips documenting these waters, I've refined my gear to a science.
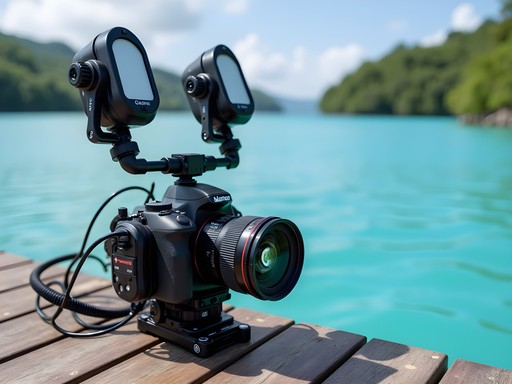
First, invest in a quality underwater housing for your camera. While budget options exist, this isn't where you want to compromise—one leak can destroy thousands in equipment. I use the underwater housing for its reliability and depth rating of 60 meters, which exceeds what you'll need in Raja Ampat but provides peace of mind.
Lighting is critical underwater, where colors disappear with depth. Two underwater strobes positioned at 10 and 2 o'clock relative to your camera will reveal the true vibrancy of Raja Ampat's marine life. The difference between natural light and properly lit underwater photographs is stark—like comparing a crime scene before and after forensic lighting.
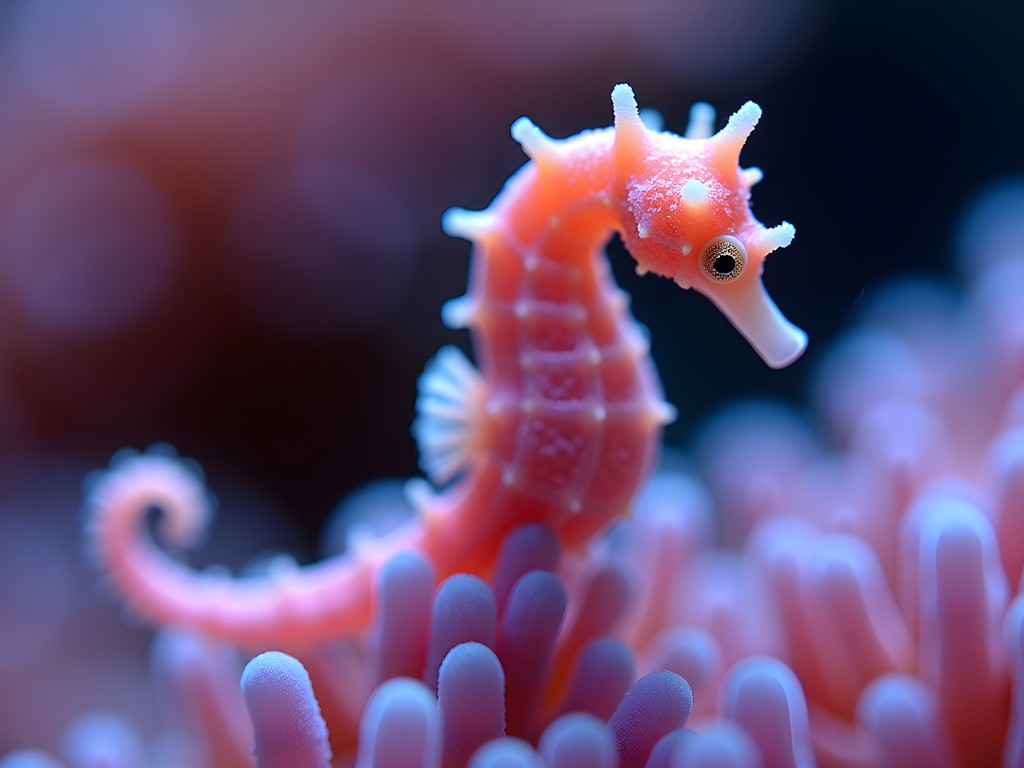
For macro photography of Raja Ampat's small wonders (pygmy seahorses and nudibranchs), I recommend adding a diopter to your kit. This magnification tool transforms ordinary close-ups into extraordinary portraits of miniature marine life.

💡 Pro Tips
- Always carry spare O-rings and silicone grease for housing maintenance
- Pack extra batteries and memory cards—you'll shoot more than you expect
- Use a neoprene cover for your housing during surface intervals to prevent overheating
Mastering Lighting Techniques
Underwater lighting follows rules entirely different from terrestrial photography. In Raja Ampat's waters, even at 5 meters depth, reds begin to disappear, leaving images with a blue-green cast unless properly lit.
Position your strobes wide to avoid backscatter—those annoying particles that appear like white snow in your images. In areas with heavy particulate matter, sometimes turning off one strobe and shooting at a 45-degree angle produces cleaner results. I learned this technique after a frustrating day at Manta Sandy where my initial images looked like underwater blizzards rather than manta ray encounters.
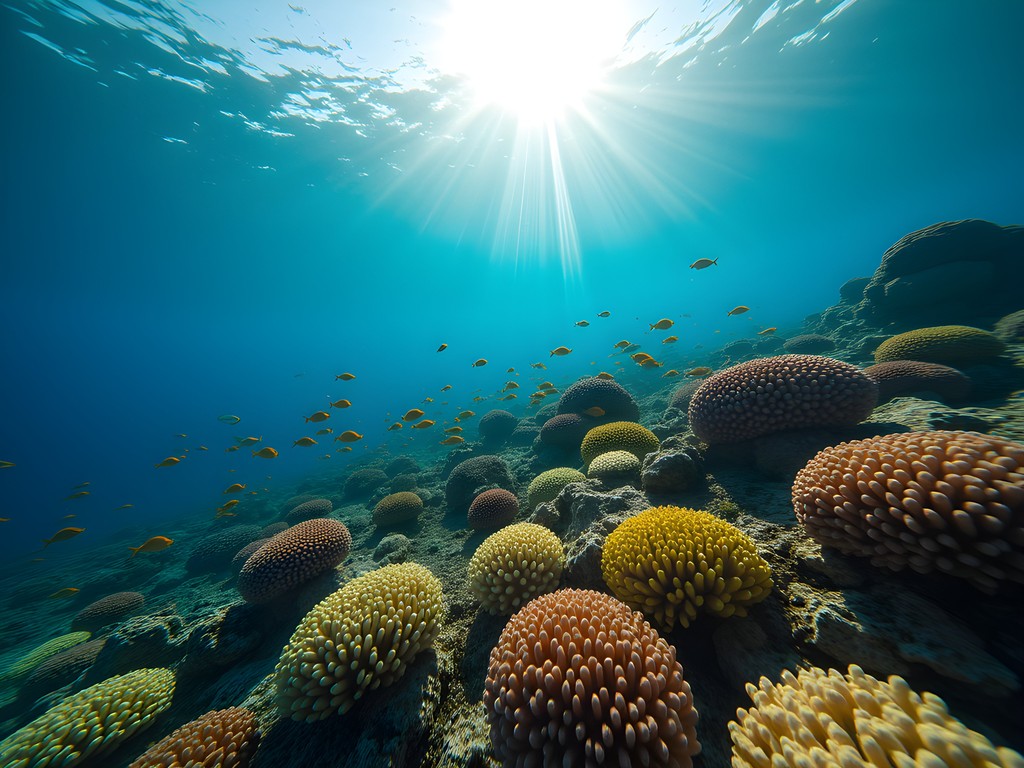
For wide-angle reef scenes, I often use a technique called 'shooting into the sun' where you position yourself with the sun behind your subject. This creates stunning sunbursts and silhouettes that add dimension to coral reef landscapes. The red filter has been invaluable for these shots when I want to capture ambient light scenes without strobe.
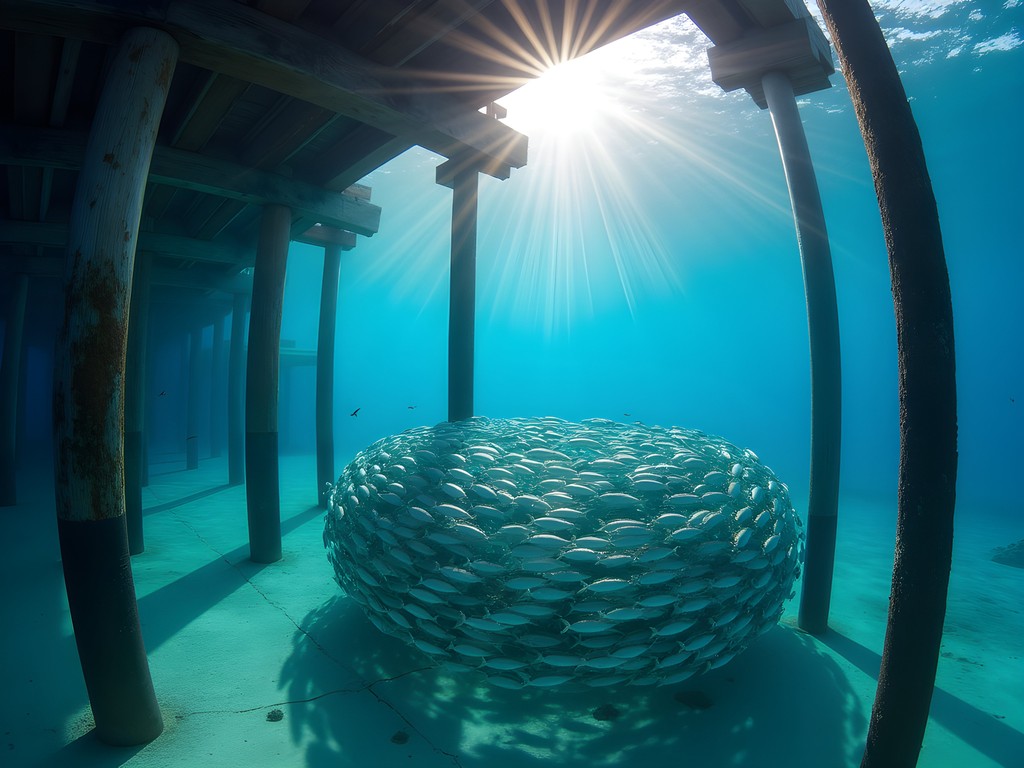
When photographing Raja Ampat's famous schooling fish, patience and positioning are everything. Find your spot, establish neutral buoyancy (crucial for stability), and wait for the school to envelop you. The dive computer helps me maximize bottom time while staying within safety limits—essential when waiting for that perfect shot.
💡 Pro Tips
- Position strobes at 10 and 2 o'clock to minimize backscatter
- Use half-power on strobes for close subjects to avoid overexposure
- For sunbursts, use apertures of f/16 or smaller
Macro Photography: Capturing Raja Ampat's Hidden Treasures
Raja Ampat's reputation for biodiversity truly shines in its macro subjects. Pygmy seahorses no larger than your fingernail hide in seafans, while flamboyant nudibranchs parade across coral in a riot of colors that would make any crime scene investigator appreciate nature's attention to detail.
For these subjects, I switch to a dedicated macro lens with my focus light which helps tremendously with focusing in the dim conditions where many macro subjects hide. The snoot attachment creates a spotlight effect that isolates your subject against a black background—a technique called 'black water photography' that's particularly effective for translucent creatures.
Patience is paramount in macro photography. I once spent 45 minutes with a single pygmy seahorse, waiting for it to turn and face my lens. My detective training served me well here—the stakeout mentality translates perfectly to underwater macro photography.
Buoyancy control becomes even more critical at this level. The buoyancy compensator allows for micro-adjustments that help maintain the perfect position without disturbing delicate subjects. Remember that in Raja Ampat, many macro subjects live on living coral—damaging habitat for a photograph is never acceptable.
💡 Pro Tips
- Use the highest shutter speed your strobe synchronization allows to freeze tiny movements
- Look for cleaning stations where small creatures congregate
- For super macro subjects, try 'focus stacking' techniques with multiple images

Wide-Angle Techniques for Reef Landscapes
Raja Ampat's reefs are architectural masterpieces that demand wide-angle treatment. The challenge lies in capturing both the grand scale and the intricate details in a single frame.
I approach reef photography like I would document a crime scene—establishing shots first, then moving closer for details. Start with a reef scene showing the topography, then move in to capture coral formations, and finally focus on the reef inhabitants.
A fisheye lens is invaluable here, but brings distortion challenges. Keep horizons centered in your frame to minimize bending, and avoid placing key subjects at the edges where distortion is most pronounced. The dome port for your housing is worth the investment for wide-angle work, as it minimizes distortion and refraction.
For split shots (half above, half below water), calm conditions are essential. Early morning dives before the wind picks up provide the best opportunity. The mask defog works equally well on dome ports—I apply it before each dive to prevent fogging that can ruin these technical shots.
When photographing Raja Ampat's famous jetties with schooling fish beneath, I've found that a slow approach and controlled breathing make all the difference. Fish are less likely to scatter if you move deliberately and release small, controlled bubbles rather than large bursts.
💡 Pro Tips
- Use a mini dome port for split shots in choppy conditions
- Include a diver in wide reef scenes to provide scale
- Shoot upward toward the surface to capture light rays penetrating the water
Planning Your Raja Ampat Photography Expedition
Raja Ampat isn't a destination you visit on a whim. As a detective, I appreciate thorough planning, and my photography expeditions here are no exception.
Liveaboard vessels offer the most comprehensive access to Raja Ampat's premier dive sites. After researching extensively, I chose the dry bag to protect my gear during transfers between ship and smaller boats. The region's sudden rain showers make waterproof protection essential even above water.
For land-based stays, Misool Eco Resort and Papua Paradise offer dedicated camera rooms and photography-focused services. Their dive guides understand photographers' needs—a crucial consideration when you're trying to capture specific subjects.
My husband and I typically visit during the November to March period when visibility is optimal (20-30 meters) and marine life activity peaks. The dive logbook helps me track sites, conditions, and camera settings—creating a valuable reference for future trips.
Bring redundancy in critical equipment. My backup underwater torch has saved numerous dives when primary lights failed. In remote locations like Raja Ampat, there's no camera shop around the corner if something breaks.
💡 Pro Tips
- Book with operators that cater specifically to photographers
- Request nitrox certification before your trip for extended bottom time
- Pack critical spare parts like O-rings, sync cords, and strobe batteries
Final Thoughts
Raja Ampat challenged and rewarded my photographer's eye in ways no other destination has matched. The precision required to capture its underwater wonders mirrors the methodical approach I've honed through years of detective work—observation, patience, and attention to the smallest details yield the most compelling results. Whether you're documenting pygmy seahorses hiding in plain sight or vast schools of fish moving in hypnotic unison, these waters demand technical excellence and respect for the environment you're privileged to photograph. As you plan your own underwater photography expedition to this remarkable corner of Indonesia, remember that your images aren't just souvenirs—they're evidence of one of our planet's last pristine marine ecosystems, worthy of our protection and admiration. The skills you develop photographing Raja Ampat will transform your underwater photography regardless of where you dive next. Like any good investigation, the journey of improvement never truly ends—there's always another layer of mastery waiting beneath the surface.
✨ Key Takeaways
- Invest in quality underwater housing and lighting equipment for optimal results
- Master both macro and wide-angle techniques to capture Raja Ampat's full range of subjects
- Visit during November-March for optimal visibility and marine life activity
- Prioritize operators who understand photographers' specific needs
- Practice proper buoyancy control to protect the delicate ecosystem while shooting
📋 Practical Information
Best Time to Visit
November to March (dry season with best visibility)
Budget Estimate
$5,000-$8,000 for a 10-14 day trip including liveaboard or resort stay
Recommended Duration
10-14 days minimum
Difficulty Level
Challenging

Comments
wanderperson
Adding Raja Ampat to my bucket list right now! Those colors are unreal!
citylover
OMG these photos are STUNNING!!! I've never done underwater photography but now I want to try! Is it possible for a complete beginner to get decent shots? What's the most affordable setup to start with?
globeperson
Not the author but I started with a simple GoPro and underwater lights. Totally doable for beginners and much more affordable than a DSLR setup!
citylover
Thanks! I actually have a GoPro already so that's perfect!
Fatima Sims
Ingrid, your post brought back so many memories! I was in Raja Ampat last year leading a photography workshop, and it truly is a photographer's paradise. One tip I'd add for readers: don't underestimate the importance of buoyancy control. I tell my students that perfect buoyancy is 80% of underwater photography success, especially for those macro shots. I remember hovering upside down for 15 minutes trying to photograph a tiny nudibranch while current swirled around me. The dive guide thought I was crazy, but the shot made it to a magazine cover! Anyone heading there should absolutely spend time perfecting buoyancy before the trip.
escapewanderer
Just got back from Raja Ampat two weeks ago! Your post perfectly captures what makes it so special. We stayed at Papua Paradise and did 3 dives daily. The macro life was incredible but I really struggled with lighting. Wish I'd read your guide before going! The section on adjusting strobe power for different subjects was exactly what I needed. Did you have any luck with blackwater dives there? We tried one but I completely failed at getting decent shots.
photoone
Papua Paradise is amazing! Did you see any walking sharks on the night dives?
escapewanderer
Yes! Two of them! Incredible experience but my photos are terrible haha
globeperson
What housing did you use for your camera? I've been looking at options for my upcoming trip and feeling overwhelmed by choices!
Ingrid Garcia
I used an Ikelite housing for my Sony. It's a bit bulky but extremely reliable and the controls are intuitive. The clear back lets you spot moisture immediately - crucial for peace of mind!
Sarah Powell
Fascinating how your crime scene analysis skills translate to underwater photography, Ingrid. I visited Raja Ampat last year and was overwhelmed by the biodiversity. Your lighting techniques section is particularly valuable - I struggled with balancing natural light and strobe in those variable conditions. The advice about positioning strobes at 10 and 2 o'clock for wide-angle shots would have saved me dozens of washed-out reef landscapes. Did you find the currents challenging for macro work? I found myself constantly fighting to stay in position.
Ingrid Garcia
The currents were definitely challenging, Sarah! I found using a reef hook (where permitted and on dead sections only) helped tremendously for macro work. Also, I'd often wait for the brief moments between current surges.
smartwanderer
Wow! I'm heading to Raja Ampat next month and just bought my first underwater camera setup! Any tips for a complete beginner? So excited but also nervous about ruining shots!
Ingrid Garcia
Thanks for reading! My top beginner tip: practice with your housing BEFORE getting in the water. Get comfortable with the buttons while dry. And remember - get close, then get closer! Water reduces clarity and color.
smartwanderer
That's super helpful, thanks! Will definitely practice with the housing first.
photoone
Those macro shots are incredible! The detail on the pygmy seahorses is mind-blowing.
travelway
What's the minimum dive certification needed to photograph the sites you mentioned? I'm only Open Water certified but really want to capture similar images.
Ingrid Garcia
Open Water is fine for many sites, but I'd recommend Advanced Open Water for the best experience. Some of the richest marine life is between 18-30m, especially the cleaning stations where mantas gather. Many dive operators require AOW for certain sites due to currents.
travelway
Thanks for the info! Guess I'll upgrade my certification before booking the trip.
Nicole Russell
I did my AOW in Thailand last year and it was totally worth it! You can actually do it right in Raja Ampat too - what better place to practice deep dives?
redrider9292
those reef shots are amazing!
Venture X
Premium card with 2X miles, $300 travel credit, Priority Pass