


Disclosure: This article contains affiliate links. We may earn a commission from purchases at no extra cost to you, which helps our travel content.
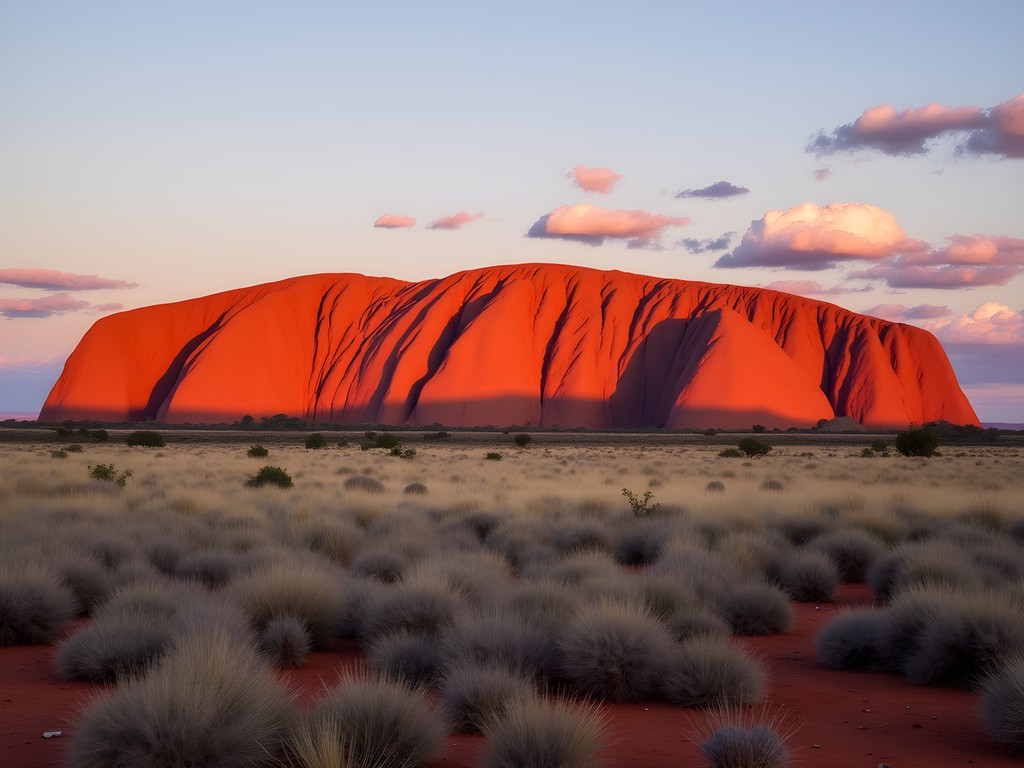
After decades of documenting dental conferences across six continents, I've developed what my colleagues call a 'clinical eye' for composition. Yet nothing in my 15 years of travel photography prepared me for the visceral impact of Uluru. This monolithic sandstone formation rising dramatically from Australia's Red Centre isn't merely photogenic—it's a living canvas that transforms with each passing hour. Last month, while attending the International Dental Symposium in Sydney, I extended my stay specifically to photograph this UNESCO World Heritage site. As someone who typically photographs European maritime scenes, the stark desert landscape presented both challenges and extraordinary opportunities. This guide distills my week-long photographic journey at Uluru, offering practical advice for fellow photographers seeking to capture its ever-changing moods and sacred presence.

Planning Your Photographic Expedition
Proper planning makes all the difference between returning with pedestrian snapshots or compelling images that convey Uluru's essence. I scheduled my visit during Australia's winter (June-August), when daytime temperatures hover around a comfortable 20°C (68°F)—quite the relief after experiencing the scorching 40°C+ summer heat during a previous Australian conference.
The Red Centre's winter also delivers consistently clear skies and lower humidity, creating optimal conditions for photography. I allocated five full days at Uluru, which proved ideal for capturing varied lighting conditions while allowing flexibility for weather contingencies.
Before departing Frankfurt, I researched sunrise and sunset times meticulously, noting that winter offers more manageable hours for these golden moments (summer sunrise can be uncomfortably early at 5:30 AM). I also consulted lunar calendars to time my visit during a new moon phase, maximizing opportunities for astrophotography.
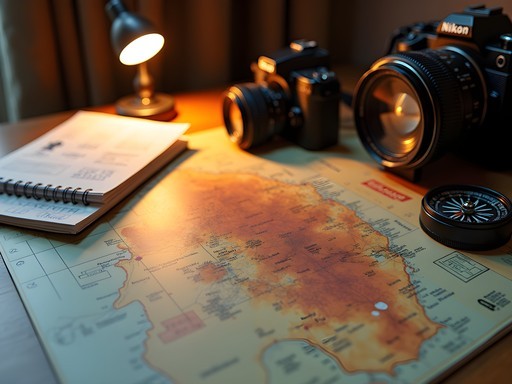
Equipment considerations for Uluru are significant. My trusty Sony Alpha 7 IV with its excellent dynamic range handled the challenging contrast between the rock and sky beautifully. I paired it with three essential lenses: a 16-35mm wide-angle for landscape compositions, a 24-70mm for versatility, and a 70-200mm telephoto to isolate textural details on Uluru's surface.
The desert environment demands protection for your gear. I brought along my camera rain cover which proved invaluable against both unexpected rain showers and the omnipresent red dust that infiltrates everything.

💡 Pro Tips
- Book accommodation at least 3 months in advance as the limited options near Uluru fill quickly
- Purchase your Uluru-Kata Tjuta National Park pass online before arrival to save time
- Consider renting specialized lenses in Sydney if you're traveling light
The Dance of Light: Sunrise and Sunset
The transformation of Uluru during golden hours transcends typical landscape photography—it becomes a meditation on light itself. After 15 years documenting European architecture and maritime scenes, I found myself recalibrating my entire approach to composition and timing.
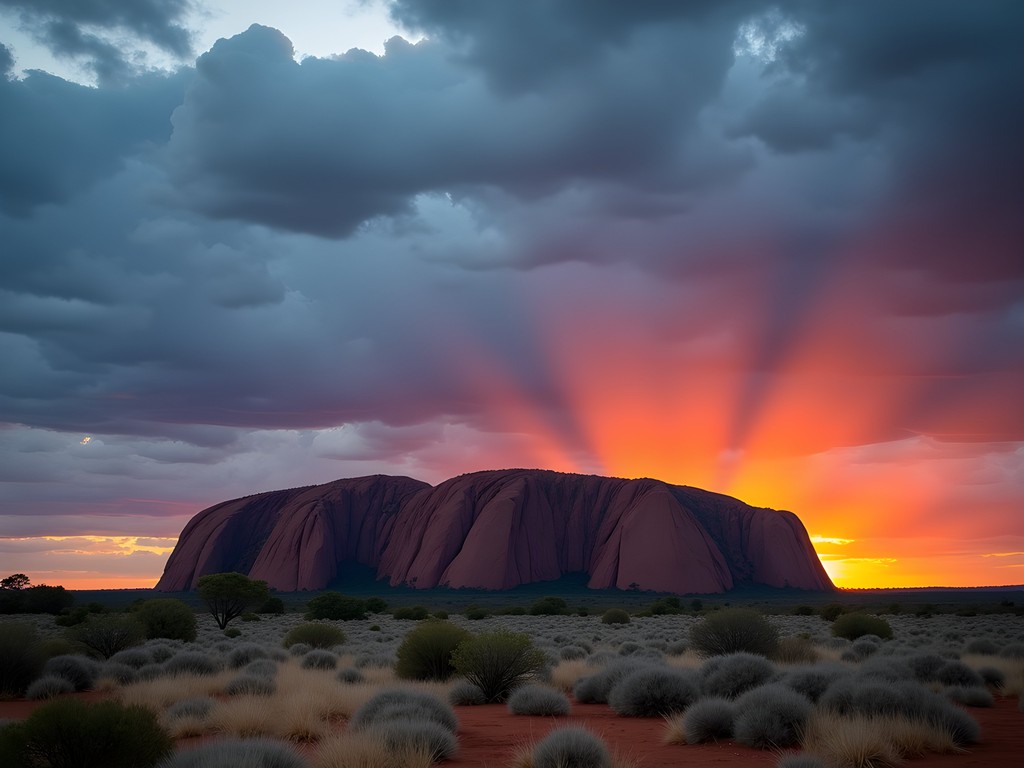
For sunrise shoots, I arrived at the designated viewing areas 45 minutes before first light. This early arrival serves two purposes: securing an optimal position among the inevitable crowd of photographers and allowing time to contemplate compositions in the pre-dawn blue hour. The eastern face of Uluru presents the most dramatic morning transformation, with colors shifting from deep purple to burnt orange within minutes.
I discovered that my usual exposure settings required significant adjustment. The rock absorbs light differently than European stone structures I typically photograph, and I found myself bracketing exposures more aggressively than usual. My tripod proved indispensable for these low-light situations, particularly when capturing the subtle gradations of color during twilight transitions.
Sunset offers an entirely different photographic experience. The western face of Uluru becomes increasingly saturated as afternoon progresses, eventually reaching an almost incandescent red that defies adequate description. I found the Talinguru Nyakunytjaku viewing area offered superior sunset compositions, with fewer obstructions and excellent elevation.
A technical note for fellow photographers: the desert air creates pronounced atmospheric distortion during midday heat. This actually presents creative opportunities for abstract compositions using a telephoto lens, capturing the rippling air currents against Uluru's textured surface—a technique I developed after noticing similar effects when photographing ferry exhaust against evening skies in Copenhagen.
💡 Pro Tips
- Position yourself at least 30 minutes before official sunrise/sunset times to capture the most dramatic color transitions
- Use graduated neutral density filters to balance exposure between bright sky and darker landscape
- Don't pack up immediately after sunset—some of my best images came during the 20-minute 'afterglow' period
Night Photography: Stars Above the Sacred
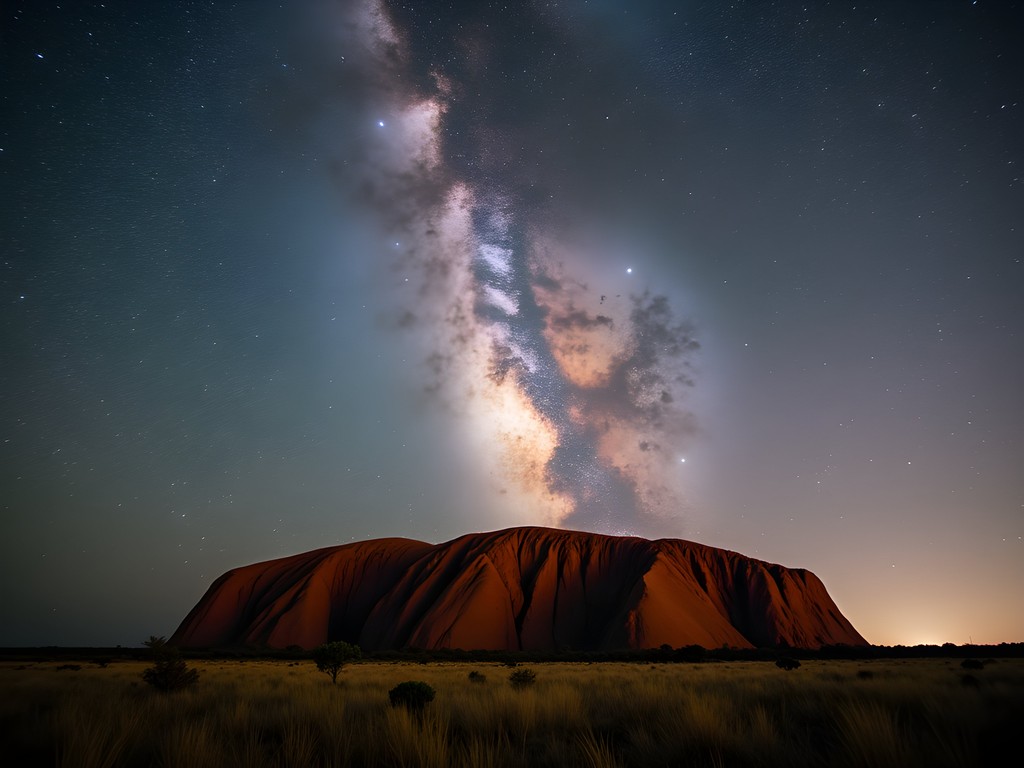
After years photographing illuminated ferry terminals along Europe's northern coasts, I found Uluru's night sky to be an entirely different technical challenge—and an absolute revelation. The Red Centre offers some of Earth's darkest skies, uncontaminated by light pollution and blessed with exceptional atmospheric clarity.
I scheduled my visit to coincide with the new moon phase, maximizing stellar visibility. For astrophotography, I ventured to the designated night viewing areas approximately one hour after sunset, allowing time for complete darkness to descend. The Milky Way positioning over Uluru changes seasonally—winter (June-August) presents it arching dramatically across the southern sky.
Technically speaking, night photography at Uluru demands specialized equipment. My intervalometer proved essential for precisely timing long exposures without introducing camera shake. For star trails, I programmed sequences of 30-second exposures over 2-3 hours, later stacking them with specialized software.
The juxtaposition of ancient rock against cosmic infinity creates compelling visual narratives. I experimented with foreground lighting techniques, using subtle red-filtered illumination to maintain night vision while highlighting Uluru's textural elements. This approach required sensitivity—Uluru is a sacred site for Aboriginal peoples, and respectful photography practices are paramount.
A practical consideration: temperatures drop significantly after sunset in the desert winter. I found myself grateful for thermal layers and fingerless gloves that allowed camera operation while maintaining warmth. The silence of the desert night creates an almost meditative shooting experience, quite unlike the bustling European ports I typically photograph.
💡 Pro Tips
- Bring a red headlamp to preserve night vision while adjusting equipment
- Pack extra batteries—cold desert nights drain them faster than expected
- Use the 500 rule (500 ÷ lens focal length = maximum exposure time) to avoid star trailing in single exposures

Cultural Sensitivity in Photography
Photographing Uluru presents unique ethical considerations that transcend typical travel photography protocols. As a visitor to this sacred Aboriginal site, I approached my work with heightened awareness of cultural sensitivities—something I've developed through years of photographing historically significant European locations.
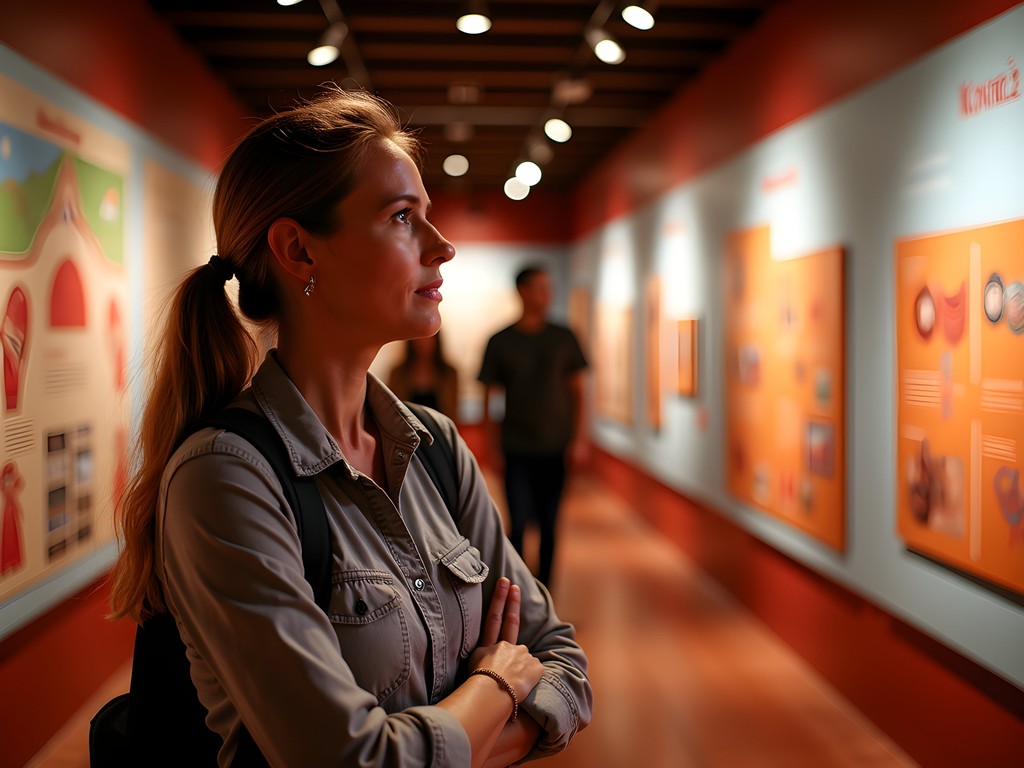
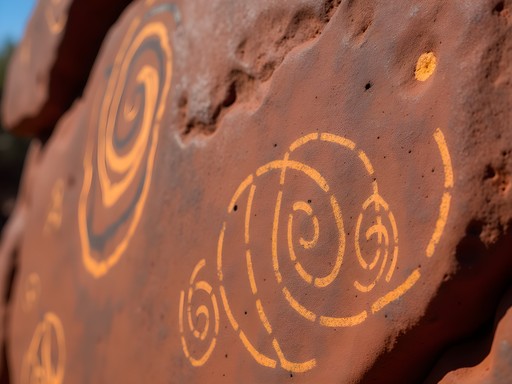
The Anangu people, traditional owners of Uluru, request that certain areas of the formation not be photographed due to their spiritual significance. These restricted zones are clearly marked throughout the park, and I made it my responsibility to research and respect these boundaries before arriving. The Uluru-Kata Tjuta Cultural Centre provides excellent educational materials explaining the significance of specific sites.
Beyond observing explicit restrictions, I found that engaging with Aboriginal cultural programs enhanced my photographic perspective. I participated in a guided walk led by an Anangu elder who shared creation stories associated with specific features of Uluru. This cultural context transformed my approach—rather than simply documenting a geological formation, I began composing images that respected and reflected the rock's living cultural significance.
A practical consideration involves obtaining proper permits. While standard park entry fees cover personal photography, any commercial use requires additional permissions. As someone who occasionally publishes in dental journals, I ensured all my documentation was properly authorized.
I also discovered that the way we speak about our photographs matters. Rather than claiming to have "captured" Uluru, I've learned to frame my work as having documented a moment of connection with this ancient place. This subtle linguistic shift reflects a deeper understanding that as photographers, we are privileged witnesses rather than owners of the landscapes we photograph.
💡 Pro Tips
- Research and respect photography restrictions before your visit
- Attend an Aboriginal cultural tour to gain deeper understanding of what you're photographing
- Consider how your images will be shared—some perspectives are appropriate for personal memories but not for public display
Beyond Uluru: Kata Tjuta and Kings Canyon
While Uluru understandably dominates the photographic attention in Australia's Red Centre, I discovered that expanding my scope to include nearby formations yielded a more comprehensive visual narrative of this ancient landscape.
Kata Tjuta (the Olgas), located just 40 kilometers west of Uluru, presents a dramatically different photographic subject. Where Uluru rises as a singular monolith, Kata Tjuta comprises 36 distinct domed formations. This geological complexity creates fascinating interplays of light and shadow throughout the day. I found the Valley of the Winds walk particularly rewarding for photography, offering intimate perspectives of the weathered rock faces and the subtle desert vegetation that thrives between them.
Technically, Kata Tjuta demands different compositional approaches than Uluru. I relied heavily on my polarizing filter to manage the intense glare from these rounded surfaces and to enhance the subtle color variations in the rock. The morning light penetrating between the domes creates dramatic crepuscular rays that reward patient photographers.
Further afield, Kings Canyon (approximately 300 kilometers from Uluru) offers yet another distinct photographic environment. The sheer sandstone walls and unexpected palm-filled gorges create striking visual contrasts. I allocated a full day for the Rim Walk, timing my hike to reach the most photogenic sections during optimal light.
A practical consideration for photographing these extended locations involves transportation. I opted for a guided photography tour rather than self-driving, which allowed me to focus entirely on composition rather than navigation. Many tours cater specifically to photographers, scheduling arrivals and departures to maximize golden hour opportunities.
💡 Pro Tips
- Use Uluru as your base but allocate at least one full day each for Kata Tjuta and Kings Canyon
- For Kata Tjuta, the Walpa Gorge is particularly photogenic in late afternoon when light reflects between the domes
- At Kings Canyon, the Garden of Eden waterhole offers striking reflections but requires hiking in with appropriate equipment protection
Final Thoughts
As I packed away my equipment on my final evening at Uluru, watching the ancient monolith fade into twilight, I reflected on how this landscape had transformed my photographic practice. After 15 years documenting European maritime scenes and dental conferences, the Red Centre demanded I develop new technical approaches while deepening my understanding of photography's ethical dimensions. The images I've brought back to Frankfurt aren't merely additions to my portfolio—they're visual testaments to moments of connection with one of Earth's most profound places. Whether you're a seasoned photographer or an enthusiastic amateur, Uluru offers unparalleled opportunities to grow both technically and artistically. Just remember: approach this sacred landscape with patience, respect, and willingness to let the place itself guide your creative vision. The most compelling images emerge not when we impose our photographic will, but when we attune ourselves to Uluru's ancient rhythms and light.
✨ Key Takeaways
- Plan visits during winter (June-August) for optimal photography conditions and comfortable temperatures
- Allocate sufficient time (minimum 4-5 days) to capture varied lighting conditions and weather patterns
- Research and respect cultural photography restrictions before shooting
- Look beyond the obvious postcard shots to find unique perspectives that convey personal connection
📋 Practical Information
Best Time to Visit
June-August (Australian winter)
Budget Estimate
$2,500-3,500 AUD for 7 days (excluding international flights)
Recommended Duration
5-7 days minimum
Difficulty Level
Moderate

Comments
sunnyblogger
Love this guide! Sharing with my photography group.
citylegend
Going there next month! Any tips on accommodation near Uluru for photographers who want early starts?
vacationadventurer
Can you do drone photography there or is it restricted?
adventureking
Drones are banned in the national park. Don't even try it.
vacationadventurer
Thanks for the heads up!
Sophia Gomez
I was in the Red Centre for a conference in Alice Springs and extended my stay specifically for Uluru photography. Your night sky section brought back memories - the Milky Way visibility there is absolutely unreal. I used my tripod for the long exposures and it handled the desert conditions perfectly. One tip I'd add: bring way more memory cards than you think you need. The light changes so dramatically every few minutes that you'll end up shooting far more than planned. Also, the flies during the day are no joke - a head net saved my sanity!
sunnyblogger
Beautiful photos! Really inspiring.
Douglas Bradley
Katherine, your perspective on cultural sensitivity really resonates. I visited Uluru last year and was surprised by how many tourists ignored the photography restrictions at sacred sites. The cultural center does an excellent job explaining the Anangu perspective, and I'd recommend anyone visiting spend time there first. It fundamentally changed how I approached photographing the rock. The sunset viewing area offers incredible opportunities without compromising respect for the traditional owners. Did you find the crowds manageable during your visit, or would you recommend specific times to avoid peak tourist density?
citylegend
Good to know about the cultural center! Adding that to my itinerary.
greenguy7527
This is my dream trip!! How many days would you recommend staying to get good photos?
globebackpacker
Great post! Quick question - what lens did you find most useful for the sunrise shots? I'm heading there in a few months and trying to decide what to pack.
adventureking
Not the author but wide angle is essential. 16-35mm range worked great for me.
globebackpacker
Perfect, thanks! That's what I was thinking too.
springhero
How many days would you recommend staying? I'm trying to plan my itinerary and not sure if 2 days is enough or if I should do 3-4 days to really capture everything.
Sage Dixon
I'd say minimum 3 days if you're serious about photography. You'll want multiple sunrise/sunset sessions to get different light conditions, plus time for the base walk and Kata Tjuta.
hikinglover
Do you know if there are any areas that are off-limits for photography? Want to make sure I'm being respectful when I visit.
springhero
There are signs posted around the base walk showing where you can't photograph - mostly sacred sites. The visitor center has a good map too.
hikinglover
Thanks! Good to know
Venture X
Premium card with 2X miles, $300 travel credit, Priority Pass