


Disclosure: This article contains affiliate links. We may earn a commission from purchases at no extra cost to you, which helps our travel content.
The first time I witnessed the aurora borealis dance across the Alaskan sky, I understood why indigenous peoples spoke of it as spirits moving between worlds. Standing in the crystalline darkness outside Anchorage, watching emerald ribbons unfurl across the cosmos, I realized that capturing this phenomenon would require everything I'd learned about light, composition, and patience during two decades of filming wildlife documentaries. This guide distills those hard-won lessons into a week-long intensive for photographers ready to push their technical and creative boundaries.
Understanding the Aurora: Science Meets Cinematography
Before you can capture the northern lights, you must understand their temperament. The aurora results from solar particles colliding with Earth's magnetic field—a cosmic light show that peaks during periods of heightened solar activity. During my winter expeditions, I've learned that the aurora forecast is your bible. The KP index measures geomagnetic activity on a scale of 0-9; anything above 3 promises visible displays at Anchorage's latitude.
What most photography guides won't tell you is that the aurora moves like a living creature. I approach it as I would filming a rare bird species—anticipating behavior, reading subtle changes in intensity and movement. The lights often begin as a faint green glow on the northern horizon, gradually intensifying into curtains that ripple and fold. This understanding transforms you from passive observer to active collaborator with the phenomenon itself.
💡 Pro Tips
- Download the Aurora Forecast app and check it obsessively—set alerts for KP index spikes above 4
- Study the aurora's typical behavior patterns: it often peaks between 10 PM and 2 AM local time
- Learn to distinguish between clouds and aurora—the lights have a distinct ethereal quality that becomes recognizable with experience
Essential Equipment for Arctic Night Photography
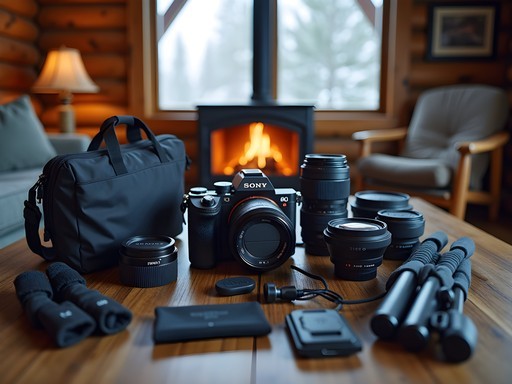
Your gear becomes an extension of your creative vision in the brutal Alaskan cold. I shoot with full-frame sensors for their superior low-light performance, paired with fast wide-angle lenses—14-24mm f/2.8 is my workhorse. But equipment means nothing if it fails in -30°C temperatures.
Battery life plummets in extreme cold, so I carry my spares in an interior pocket against my body heat. More critically, I use hand warmers not just for comfort but strategically placed inside my jacket pockets to keep batteries warm between shots. A sturdy tripod is non-negotiable—I've watched lesser equipment vibrate in Arctic winds, ruining 30-second exposures. Cable releases prevent camera shake, though I've increasingly relied on interval timers for capturing the aurora's evolution over hours.
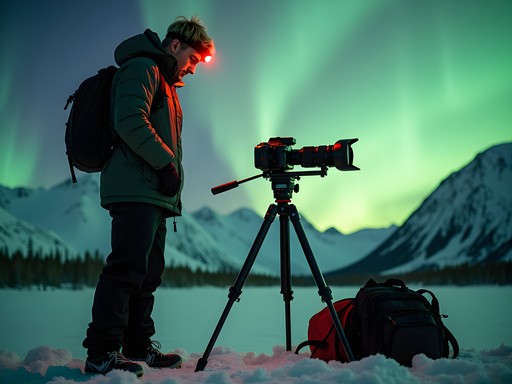
The piece of equipment that transformed my aurora work isn't camera-related at all: a high-quality headlamp with red light mode. Red light preserves your night vision while allowing you to adjust settings, check compositions, and navigate safely. White light destroys the dark adaptation your eyes need to truly see the aurora's subtle variations.

💡 Pro Tips
- Bring at least four spare batteries and rotate them against your body throughout the night
- Use gaffer tape to seal camera seams and prevent condensation when moving between extreme temperatures
- Pack a microfiber cloth in a sealed bag—condensation on your lens will ruin shots faster than any technical error
Prime Locations Around Anchorage
Anchorage's light pollution presents challenges, but strategic location scouting reveals exceptional vantage points. My favorite is Kincaid Park on the city's western edge—accessible yet sufficiently dark, with sweeping views across Cook Inlet toward the Alaska Range. The coastal trail provides foreground interest with ice formations and weathered driftwood.
For truly pristine skies, I drive north to Hatcher Pass, roughly 90 minutes from downtown. The elevation and remoteness deliver inky darkness punctuated only by starlight and aurora. The alpine landscape provides dramatic compositions, though winter road conditions demand a capable vehicle and winter driving experience. I always carry an emergency kit with flares, blankets, and supplies—cellular service is nonexistent, and temperatures can prove deadly if you're stranded.
Glen Alps trailhead offers a middle ground: close enough for easy access, high enough for reduced light pollution, with spectacular views over Anchorage's glittering grid below. The juxtaposition of urban lights and cosmic phenomena creates compelling narrative tension in your compositions.

💡 Pro Tips
- Scout locations during daylight to identify safe parking, composition elements, and potential hazards hidden by darkness
- Share your location and expected return time with someone—solo winter photography carries inherent risks
- Arrive early to allow your eyes 20-30 minutes to dark-adapt before the aurora appears

Technical Settings and Shooting Strategies
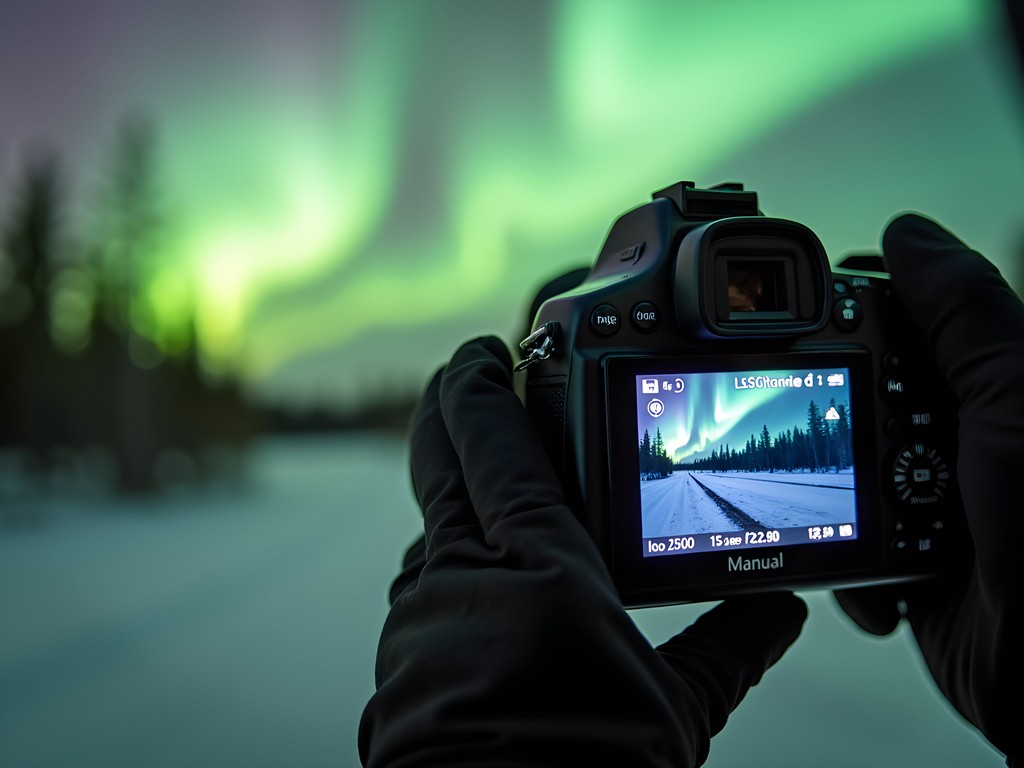
Aurora photography exists at the intersection of technical precision and creative intuition. I typically start with manual mode: ISO 1600-3200, aperture wide open (f/2.8 or faster), and shutter speeds between 5-25 seconds. But these are starting points, not gospel—the aurora's intensity varies dramatically.
During explosive displays, I've shot at 2-second exposures to freeze the aurora's rapid movement, capturing individual rays and curtain structures. Conversely, faint aurora requires longer exposures, though beyond 30 seconds you risk star trails becoming distracting. I constantly adjust based on what I'm seeing and the story I want to tell. Are you capturing the aurora's frenetic energy or its meditative presence?
Focus presents unique challenges in total darkness. I use live view, zoom to maximum magnification on a bright star, and manually focus until it appears as a sharp point. Then I switch to manual focus and don't touch it again. Some photographers use gaffer tape to lock their focus ring—paranoid perhaps, but I've seen gloved hands accidentally shift focus during critical moments. I also keep a lens cleaning kit accessible for clearing frost buildup without touching the glass.
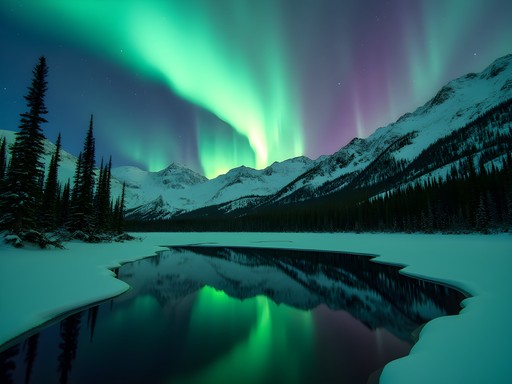
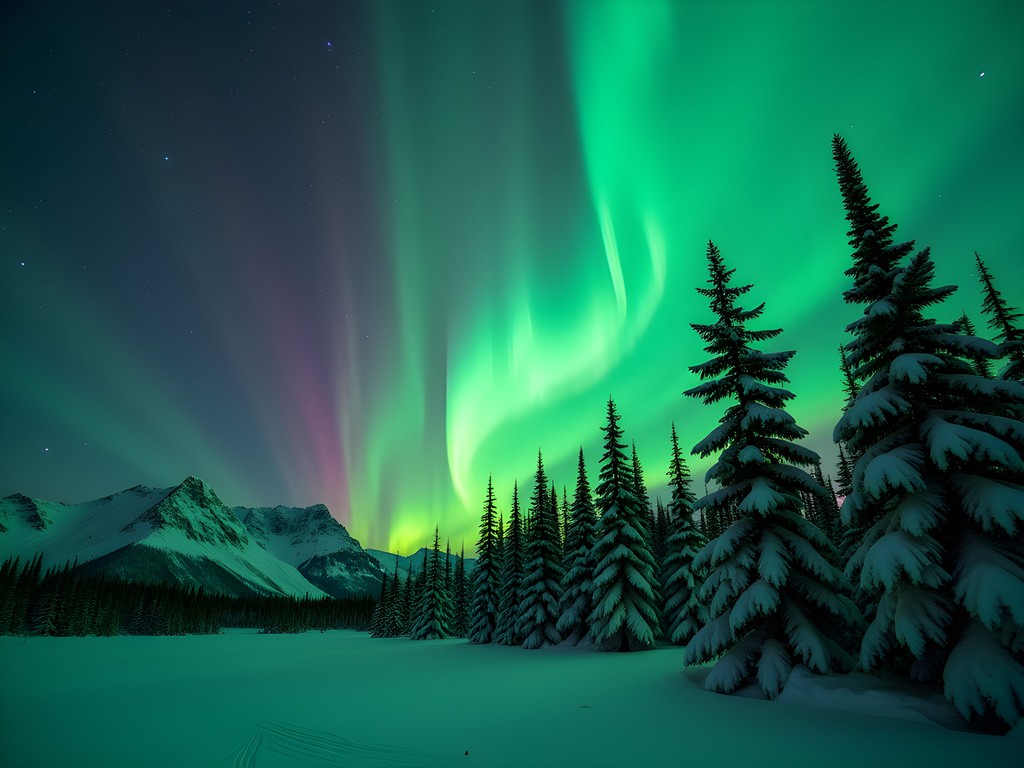
Composition follows cinematic principles: establish foreground interest to provide scale and depth. Lone trees, ice formations, or distant mountains anchor your frame and prevent the aurora from becoming an abstract blob of light. I often shoot vertical panoramas, capturing the aurora's full arc from horizon to zenith.
💡 Pro Tips
- Shoot in RAW format exclusively—you'll need maximum flexibility during post-processing to reveal subtle color gradations
- Take test shots every few minutes as the aurora's brightness changes—what worked five minutes ago may be overexposed now
- Bracket your exposures during peak displays—you can blend them later for optimal dynamic range
Surviving and Thriving in Extreme Cold
Technical skills mean nothing if hypothermia forces you inside after twenty minutes. Layering is essential: merino wool base layers, insulating mid-layers, and windproof shells. I've learned that your extremities fail first—invest in serious boots rated to -40°C and expedition-weight gloves. I use a layered glove system: thin liner gloves for operating camera controls, with heavy mitts overtop between shots.
Your face requires protection beyond a standard balaclava. I wear a face mask designed for extreme cold, which prevents frostbite while allowing enough dexterity to look through the viewfinder. Goggles prevent your eyelashes from freezing together—yes, this happens, and yes, it's as unpleasant as it sounds.
Nutrition and hydration are critical but challenging. I carry a insulated bottle with hot tea inside my jacket—external bottles freeze solid within an hour. High-calorie snacks maintain your body's furnace: nuts, chocolate, energy bars. I've found that eating small amounts every 30 minutes sustains energy far better than one large meal.
Mental preparation matters as much as physical. Hours in darkness and cold test your resolve. I've stood in -35°C conditions for six hours waiting for the aurora to intensify. Having a clear creative vision—specific shots you're pursuing—provides purpose that transcends discomfort.

💡 Pro Tips
- Practice operating your camera with gloves before the actual shoot—fumbling with controls wastes precious time and heat
- Bring chemical hand warmers but use them strategically—they're finite resources during long nights
- Never touch metal with bare skin in extreme cold—instant frostbite is a real risk
Final Thoughts
Photographing the aurora borealis in Anchorage demands everything from you—technical mastery, physical endurance, and creative vision refined through experience. But standing beneath those celestial curtains, watching light that traveled 93 million miles from the sun interact with Earth's magnetic embrace, you'll understand why this pursuit captivates photographers worldwide.
The images you capture will be uniquely yours, shaped by your choices, your patience, and your willingness to embrace discomfort in service of art. I've filmed wildlife across six continents, but few experiences rival the aurora's combination of technical challenge and spiritual resonance. Anchorage provides the perfect base: accessible yet wild, developed yet still connected to the raw Arctic that produces these lights.
Pack your gear, study the forecasts, and prepare yourself mentally for long, cold nights. The aurora doesn't guarantee success—it offers opportunity. What you do with that opportunity defines not just your photography, but your relationship with the natural world's most spectacular light show.
✨ Key Takeaways
- Master your technical settings before arriving—the aurora won't wait while you fumble through menus in the dark
- Location scouting during daylight prevents wasted time and dangerous situations during actual shoots
- Extreme cold preparation isn't optional—proper gear and nutrition enable the extended sessions required for exceptional images
📋 Practical Information
Best Time to Visit
December through March, with February offering the best combination of clear skies and aurora activity
Budget Estimate
$3,500-5,500 for luxury accommodations, vehicle rental, equipment, and dining over one week
Recommended Duration
7-10 days to account for weather variability and allow multiple shooting opportunities
Difficulty Level
Advanced—requires Technical Photography Skills, Extreme Cold Experience, And Physical Endurance
Comments
Megan Martin
This is a comprehensive resource. I visited Anchorage on a business trip last fall and managed to squeeze in one evening of aurora photography at Kincaid Park - your recommendation was spot on. The lack of light pollution there is remarkable. For business travelers like myself who might only have limited windows, I'd suggest downloading an aurora forecast app and being ready to drop everything when conditions align. I literally left a dinner early when I got the notification, and it was absolutely worth it.
springzone5084
This might be a dumb question but do you need a really expensive camera for this? I just have a basic DSLR and wondering if it's worth trying or if I should just enjoy it with my eyes?
Megan Martin
Not a dumb question at all! Any DSLR with manual controls will work. The key is having a fast lens (wide aperture) and a sturdy tripod. Your camera body matters less than the glass.
coolone
Yeah definitely try it! I got decent shots with my old Canon Rebel. Just bring a good tripod and you'll be fine
globewanderer1417
Love the photos! Really inspiring work.
Sarah Powell
Excellent guide, Avery. I particularly appreciated your technical breakdown of the settings. One thing I'd add for readers: don't underestimate the cold. I shot in Anchorage last winter and even with proper gear, my fingers were numb within 20 minutes. Bring hand warmers and practice changing your camera settings with gloves on before you go out. Also, that tip about letting your camera acclimate slowly when you bring it back inside is crucial - I've seen too many lenses fog up from rapid temperature changes.
moonwalker
Quick question - what month did you go? I'm trying to figure out the best time to visit for maximum aurora activity.
Sarah Powell
Not the author, but I've been twice. Late February through March is excellent, and September-October gives you good viewing windows too. You want those long, dark nights.
moonwalker
Thanks! That's really helpful
summerfan
OMG this is amazing!! I've always wanted to see the northern lights! Adding Anchorage to my bucket list right now 😍
Gregory Boyd
Excellent technical breakdown, Avery. The section on ISO management was spot-on. I'd add one thing from my own aurora shoots in Iceland and Norway - bring multiple batteries and keep them warm against your body. The cold absolutely murders battery life. I learned this the hard way losing half my charge in 20 minutes at -15°C. Also, your point about manual focus is critical. I use a piece of gaffer tape to lock my focus ring once I've nailed infinity focus, prevents accidental bumps in the dark. The Hatchers Pass location you mentioned is brilliant - been meaning to get up there myself.
wildfan
This looks amazing!! Quick question - what time of year is best for seeing them? Planning a trip and totally new to this!
Gregory Boyd
Winter months (September through March) are your best bet. The darker nights give you more viewing time. I was up there in February 2024 and had clear skies four nights out of seven, which is pretty solid odds.
wildfan
Thanks! Super helpful
Venture X
Premium card with 2X miles, $300 travel credit, Priority Pass